

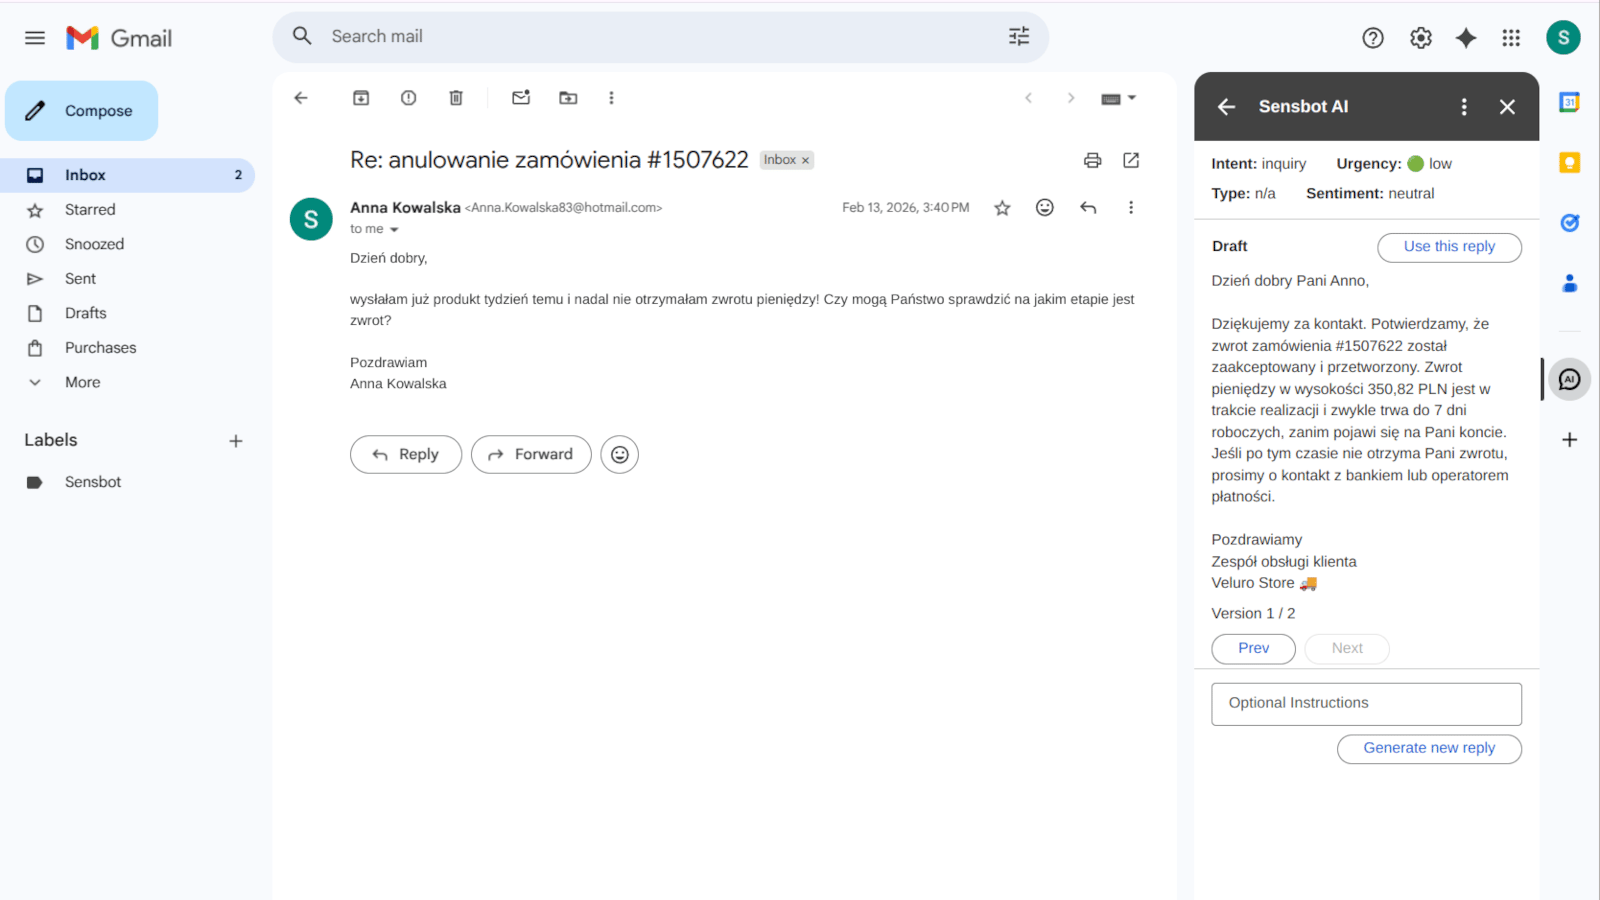
This plugin connects your store. The mailbox is connected afterwards in the Sensbot dashboard, by signing in to Google or Microsoft or by giving IMAP details. Nothing about your mail passes through your WordPress site, and no mailbox password is ever stored in WordPress.
Before you start
You do not need a Sensbot account first. Connecting creates it and starts a 14 day free trial, with no payment card.
Step 1 · Install the plugin
- In your WordPress admin, go to Plugins, then Add New Plugin.
- Search for Sensbot Email Assistant.
- Click Install Now, then Activate.
This plugin has no front-end code. Your visitors see nothing and load nothing extra. A chat assistant on the storefront is the separate Sensbot Chatbot plugin, and the two can be used together.
Step 2 · Connect the store
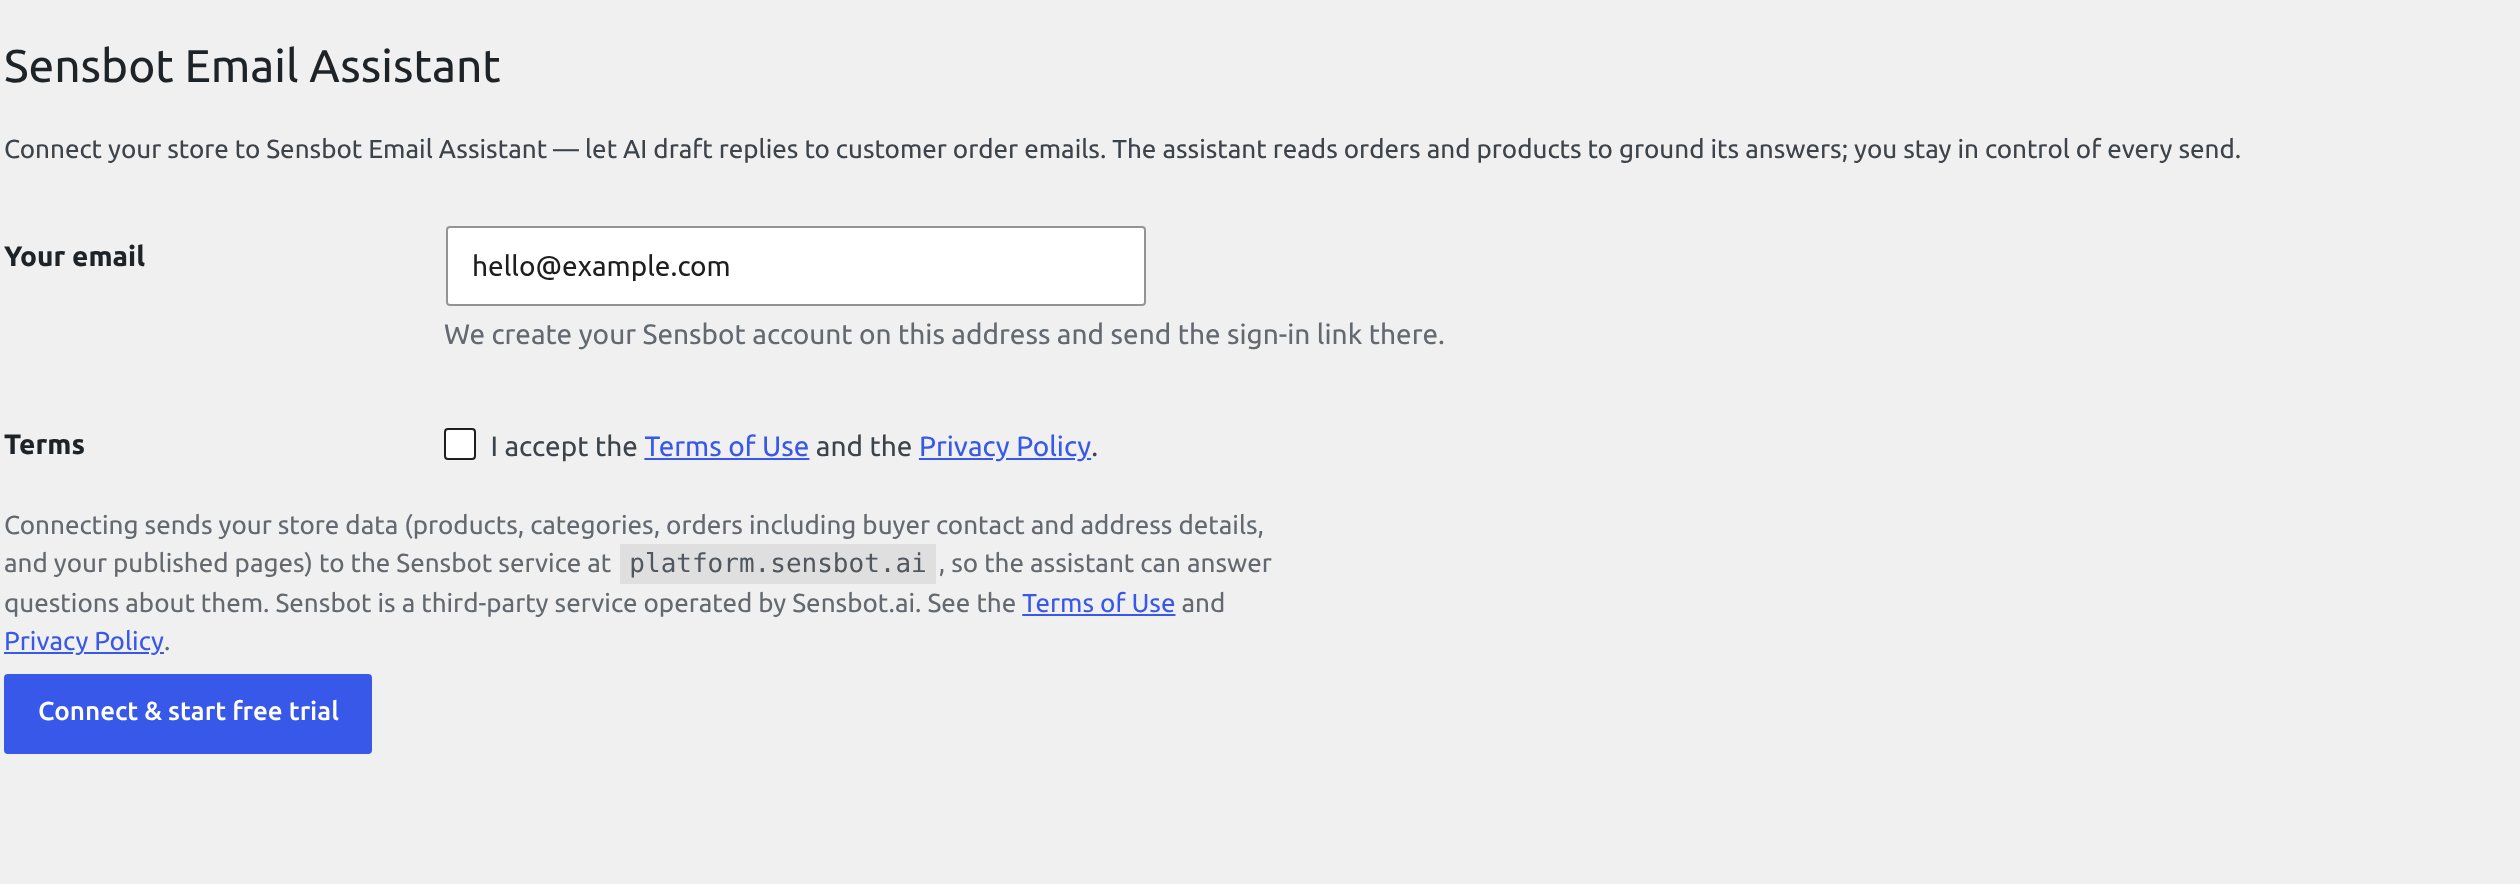
- Go to WooCommerce, then Sensbot Email Assistant.
- Check the Your email address. This becomes your Sensbot account address and the sign-in link is sent there.
- Tick I accept the Terms of Use and the Privacy Policy.
- Click Connect & start free trial.
Sensbot Email Assistant (read-only) and hands it to Sensbot. Sensbot cannot change anything in your store, and the key is deleted when you disconnect or delete the plugin.
Follow the Set my password link that appears, so you can sign in to the dashboard directly later.
Step 3 · Connect the mailbox
Once the store is in, the settings screen says One step left: connect the mailbox the assistant should work in. Until a mailbox is attached the assistant has nothing to read and writes no drafts.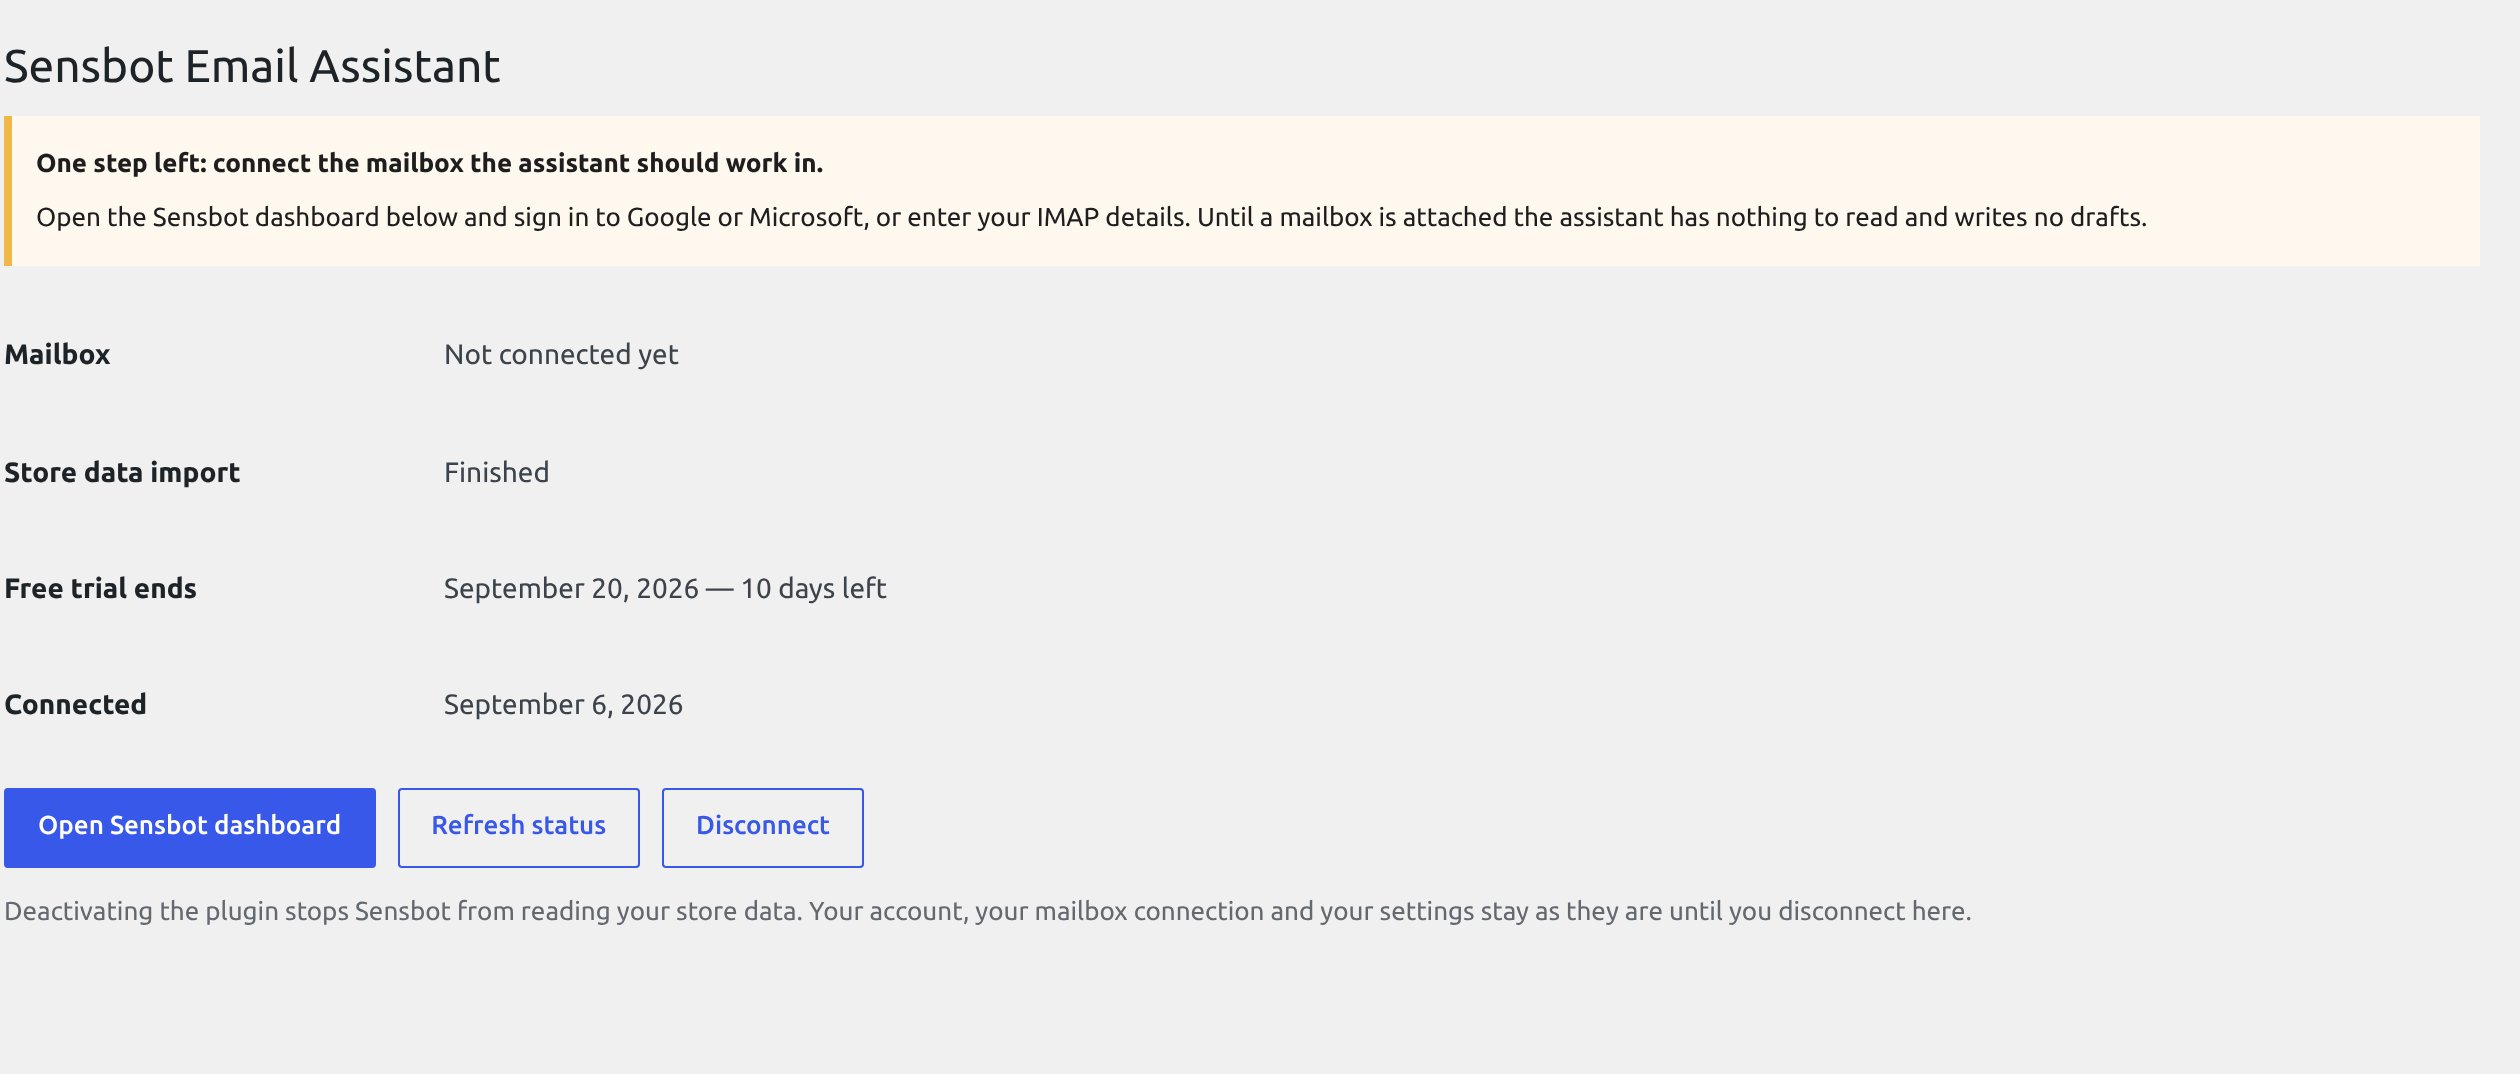
- Click Open Sensbot dashboard.
- Open the Email Assistant tab for your store.
- Click Connect Email Account and choose how to connect:
- Gmail — sign in to Google and confirm access.
- Outlook / Microsoft 365 — sign in to Microsoft and confirm access.
- IMAP / SMTP — enter your mail server details.
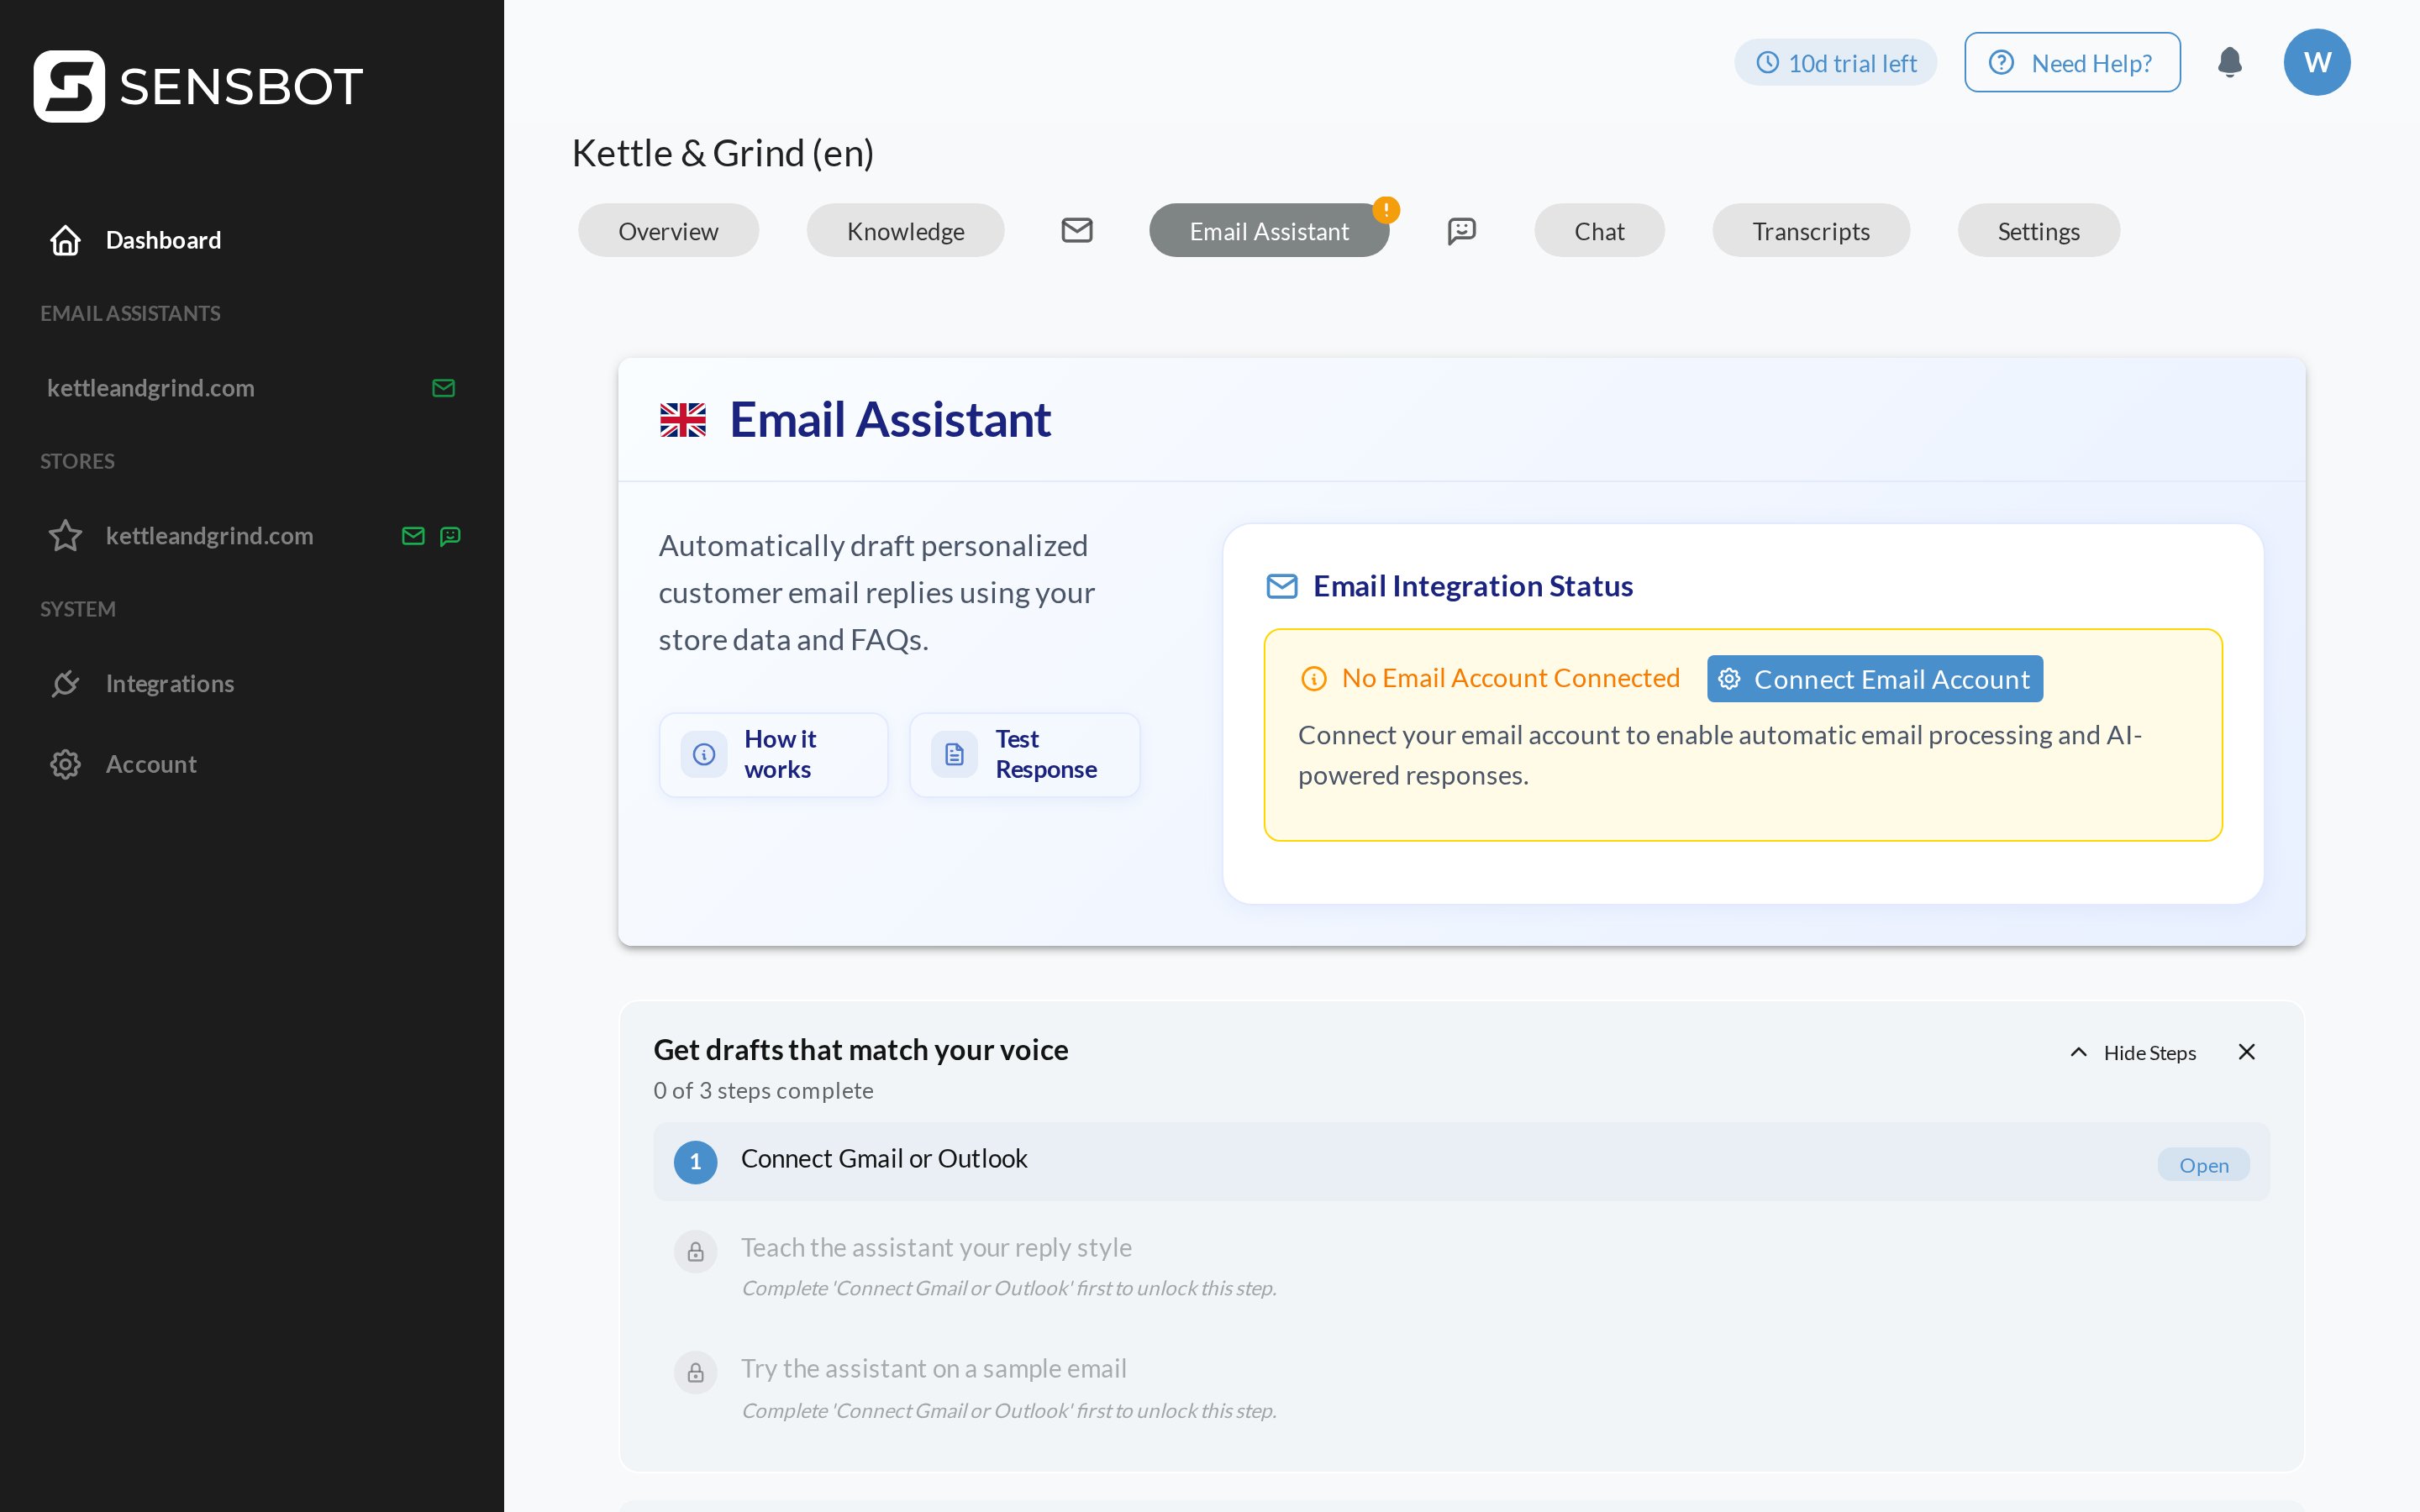
Connected.
A Google or Microsoft sign-in cannot happen inside a WordPress settings screen, which is why this step lives in the dashboard. Shared mailboxes such as
info@yourstore.com on Microsoft 365 need a little extra care: see Microsoft 365 Setup.We can also connect some helpdesk platforms instead of a raw mailbox. Write to support@sensbot.ai and tell us which one you use.
Step 4 · Let it learn your writing
The assistant reads the replies you have already sent and copies how your shop writes: greeting, sign-off, length, how formal you are. Give it a little time on a real mailbox before you judge the first drafts, and shape it in the dashboard:- Writing style — signature, greeting, tone.
- Custom instructions — what to promise, what never to say.
- Email filters — which messages it should touch at all.
- Auto reply rules — how far it is allowed to go on its own.
Step 5 · Work the drafts where you already work
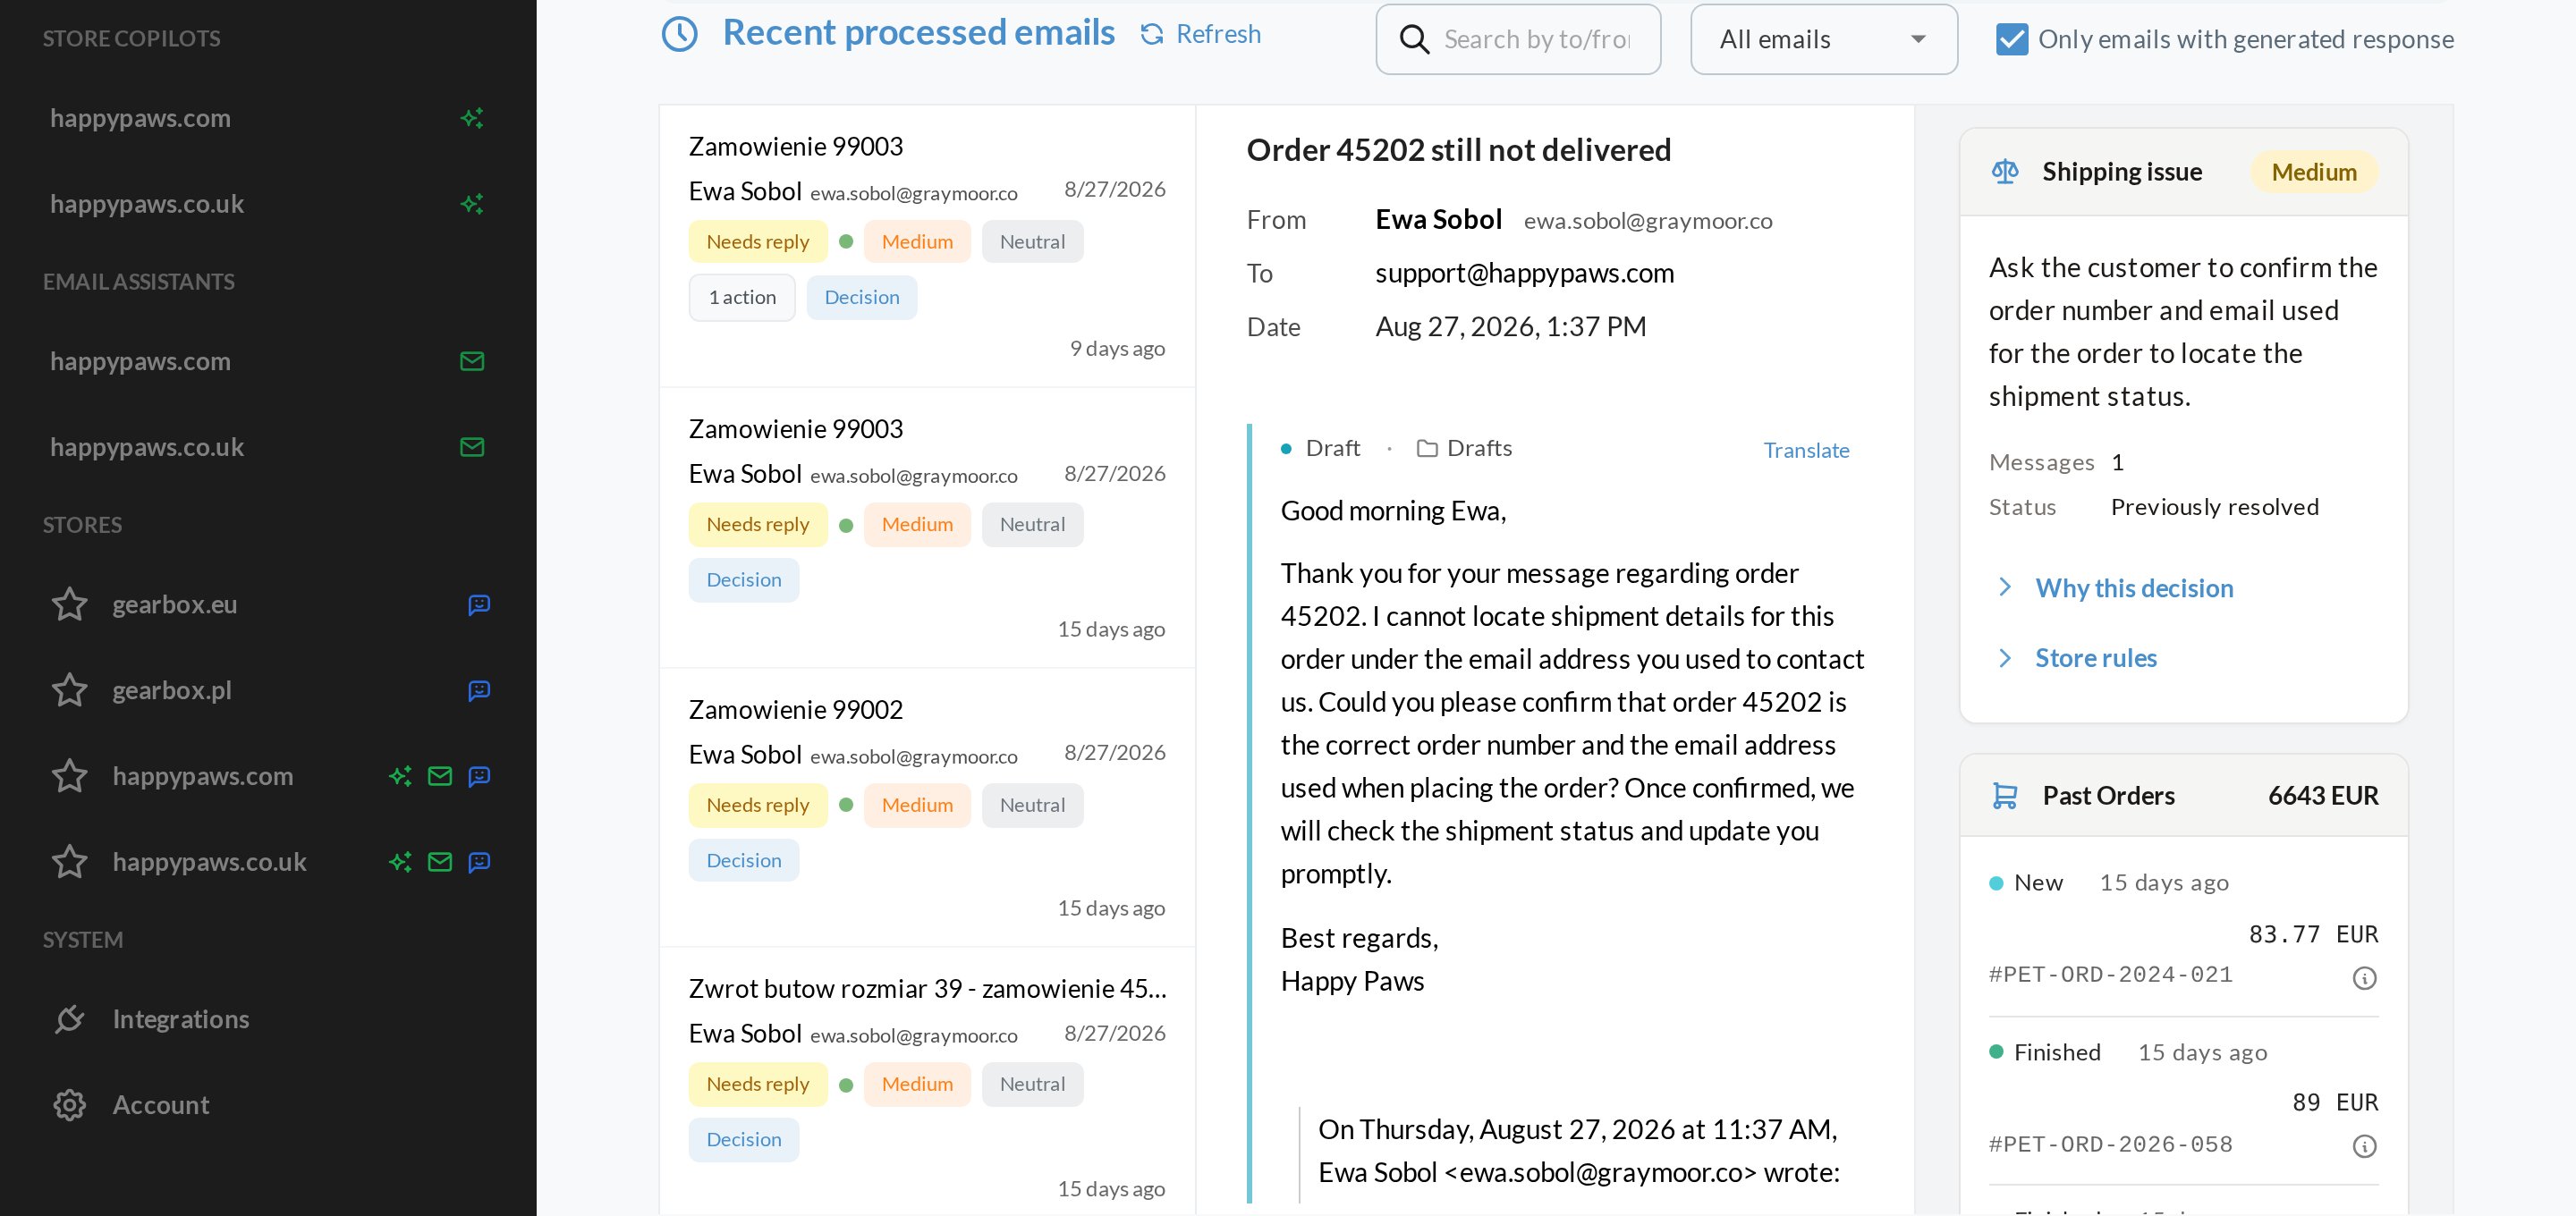
The drafts land in your mailbox’s own Drafts folder, so you can simply work in Gmail or Outlook as usual. Two optional add-ins put the assistant beside the message, with the reasoning, the order it found, and a Generate new reply button: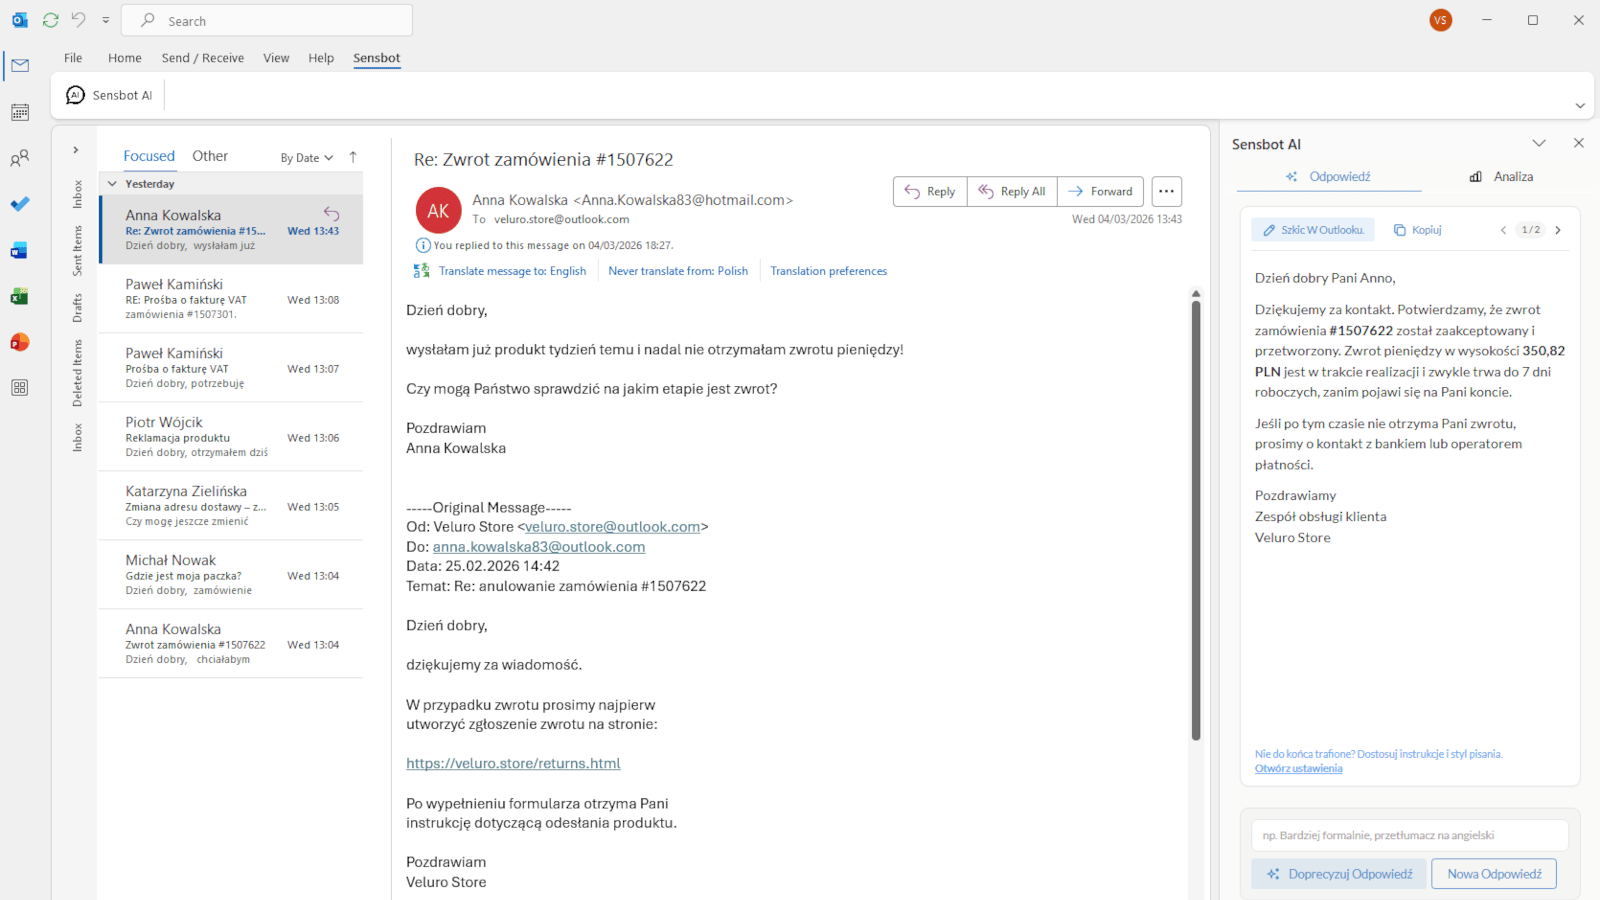
What the plugin does on your site
- Creates one read only WooCommerce REST API key,
Sensbot Email Assistant (read-only). - Adds one settings screen under WooCommerce.
Troubleshooting
Connecting fails with an error about reaching the store
Connecting fails with an error about reaching the store
Sensbot validates the key by calling your store from the outside. It fails when the site is not on HTTPS, is not publicly reachable (local address, staging password, “Coming soon” mode, IP allowlist), has permalinks set to Plain, or has a security plugin blocking the WooCommerce REST API.Test it: open
https://your-store.com/wp-json/ in a browser. If that does not return JSON, fix that first.The mailbox says Not connected yet, but I connected it
The mailbox says Not connected yet, but I connected it
Click Refresh status on the settings screen. The row is read from Sensbot at page load, so it lags until you ask for it again.If it stays that way, open the dashboard and check the Email Assistant tab: a Google or Microsoft consent that was closed halfway leaves no connection behind.
No drafts are appearing
No drafts are appearing
Work through it in this order:
- Is the Mailbox row
Connected? - Is the Store data import row
Finished? - Are the incoming messages actually landing in the connected mailbox, and not being filtered into another folder by a rule before Sensbot sees them?
- Do your email filters exclude the kind of message you are testing with?
The drafts do not sound like us
The drafts do not sound like us
The assistant learns from the replies you actually send, so the more real sent mail there is in the mailbox, the closer it gets. You can steer it directly in Writing style and Custom instructions.
A draft quoted an old price or the wrong order state
A draft quoted an old price or the wrong order state
Store data is read at connect and refreshed on a recurring schedule, not instantly. A change made in WooCommerce takes some time to reach the assistant.
I deactivated the plugin. What did I lose?
I deactivated the plugin. What did I lose?
Nothing. Deactivating stops Sensbot reading your store data. Your account, your mailbox connection and your settings stay as they are, so you can activate again without setting anything up a second time.To actually close the connection, use Disconnect on the settings screen, or delete the plugin.
Trial, pricing and billing
Connecting starts a 14 day free trial, with no payment card. After the trial, paid plans start at 49 EUR per month. Current plans and limits are at sensbot.ai/pricing. If no payment method is added, the trial ends, drafting stops, and nothing is charged. Billing is handled in the Sensbot dashboard, not in WordPress.Disconnecting and removing everything
- Disconnect on the settings screen closes the connection on Sensbot’s side and deletes the API key, while keeping the plugin installed.
- Deleting the plugin does the same and also removes every setting it stored.