✅ Step 1: Install Sensbot from the Shopify App Store
- Go to the Sensbot AI Chatbot app page.
- Click Install, then follow the prompts to install it in your Shopify store.
✅ Step 2: Open Sensbot Settings
- In your Shopify admin, go to Apps > Sensbot.
- The Sensbot settings page will open (within an iframe).
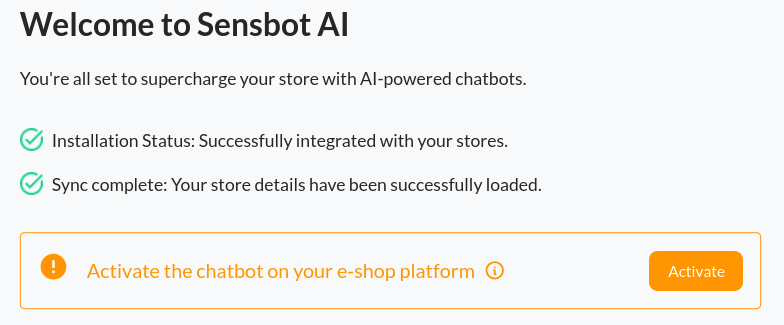
- Sensbot will begin syncing your store’s products and orders.
⏳ Note: Syncing can take a few minutes for small stores, and up to a few hours for very large ones. You can continue setup while syncing completes in the background.
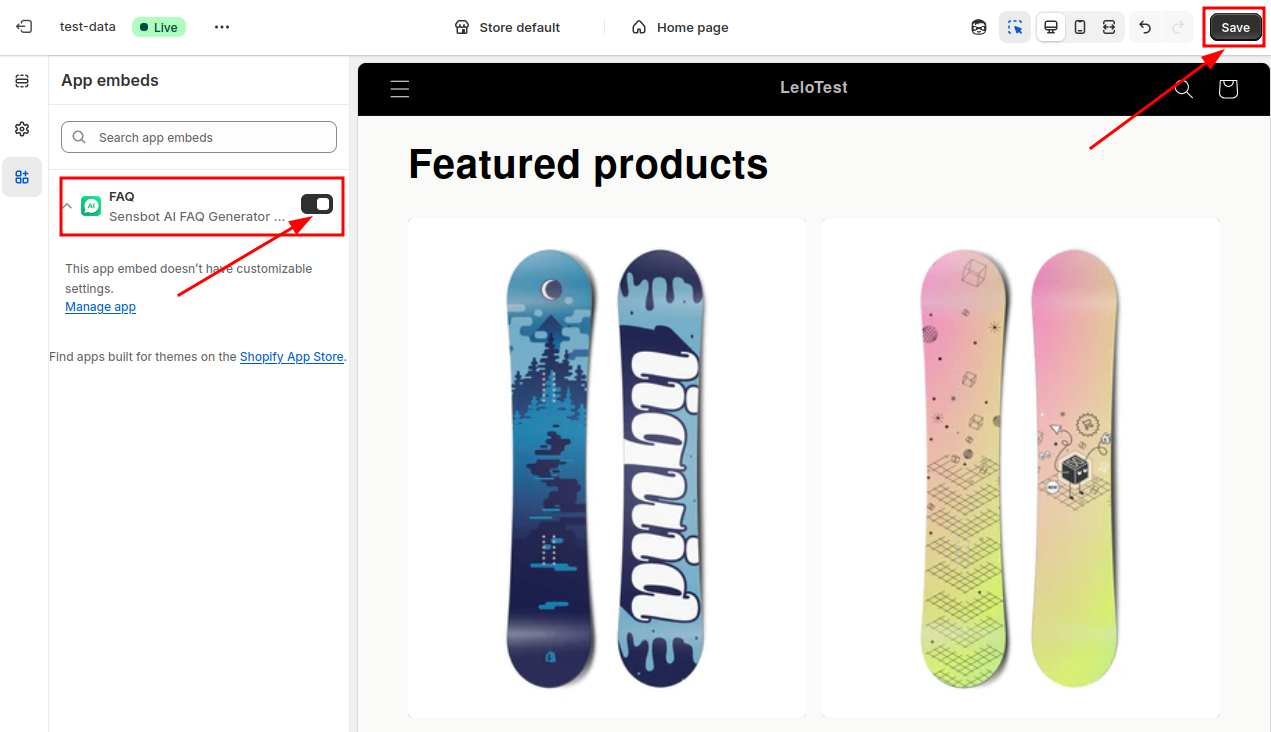
✅ Step 3: Enable FAQ Generator App Embed
- In the Sensbot settings, click the “Enable App Embed” button.
This will redirect you to the correct section in your Shopify Theme Editor.
- In the Theme Editor:
- Find Sensbot AI FAQ Generator under App Embeds.
- Toggle the switch to Enable Sensbot AI FAQ Generator.
- Click the Save button in the top-right corner.
⚠️ Important: You must click Save for the FAQ feature to activate on your storefront.
✅ Step 4: Add FAQ Code to Your Page
- In your Shopify admin, go to Online Store > Pages.
- Select or create the page where you want the FAQ to appear (e.g., “Frequently Asked Questions”).
- Click the code icon (
</>) in the content editor toolbar to switch to HTML editing mode. - Add the following code where you want the FAQ to display:
- Click Save to save your changes.
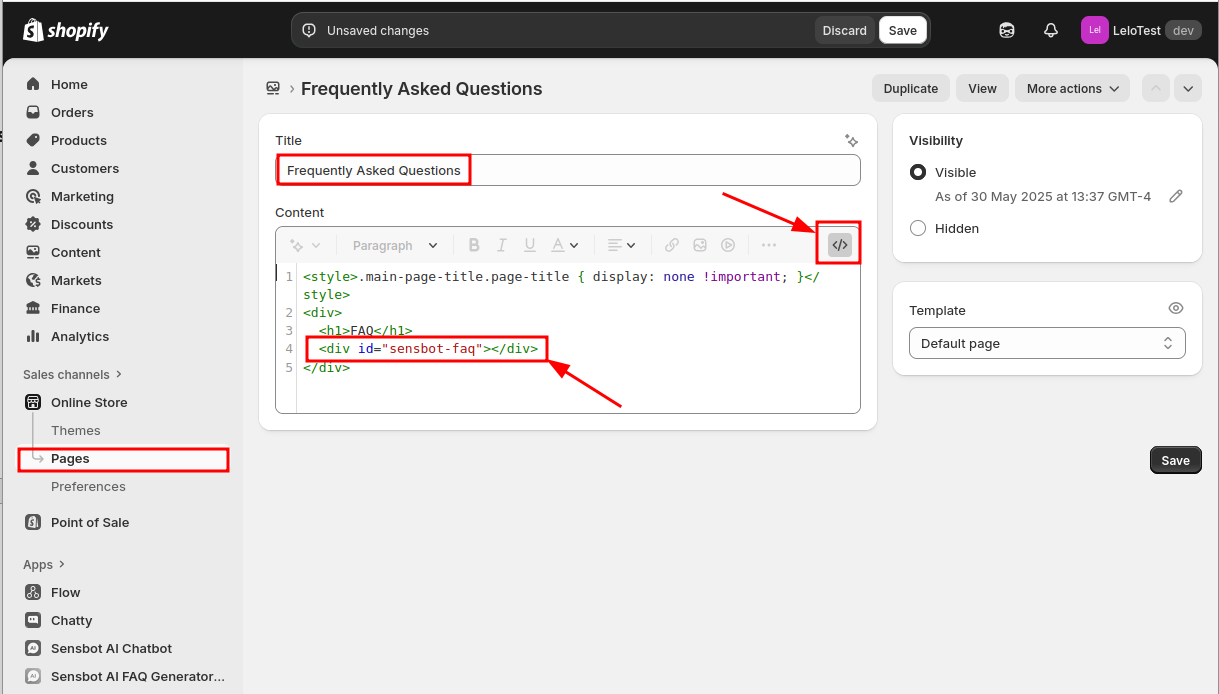
💡 Tip: You can add this code anywhere in your page’s HTML content. The FAQ will render at that location.
✅ Step 5: Configure FAQ Generator
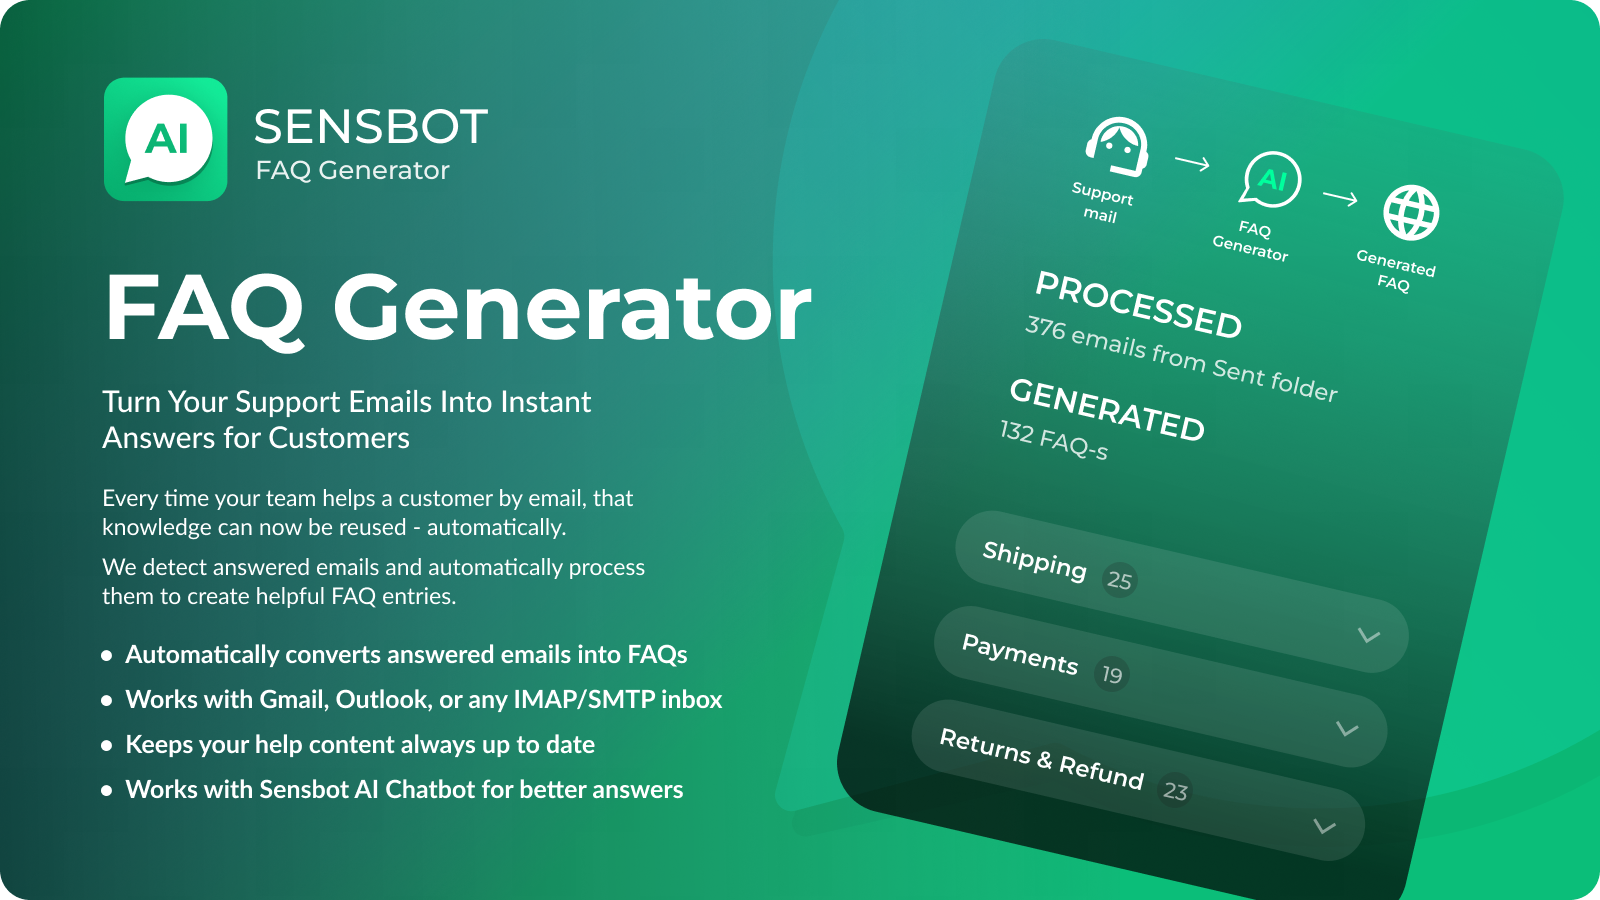
Turn your support emails into instant answers for customers. Every time your team helps a customer by email, that knowledge can now be reused — automatically. We detect answered emails and automatically process them to create helpful FAQ entries:- Extract the question
- Understand your team’s response
- Create a new help entry (or update an existing one)
- Make it instantly available for others
Connect Your Email Account (Recommended)
The easiest and most efficient way to automatically process your support emails:- Connect your email account (Gmail, Outlook, or IMAP/SMTP)
- Our system automatically detects answered customer emails
- FAQ entries are created automatically from your support conversations
- No manual forwarding or BCC required
Manual Forward/BCC Method
For users who prefer manual control or can’t connect their email account:- When replying to customer emails, BCC or forward them to your unique Sensbot email address
- Our system reads the message, understands what was asked, and how your team responded
- A new help entry is created automatically — or an existing one is updated if the question has already been answered
- These entries show up in your Help Center and are available to the chatbot as well (if enabled)
⚠️ Important: The email should contain BOTH the customer’s question and your support team’s response/answer.
💡 What kind of emails work best? Product or shipping questions, returns/refunds/warranty info, common issues or complaints, and how-to advice or setup guides.
Customize FAQ Appearance
You can customize the appearance of your FAQ page to match your brand:- Change fonts and colors: Adjust typography and color scheme to align with your store’s branding
- Choose widget view: Select between nested or flat FAQ widget view to best fit your page layout
- Adjust styling: Fine-tune the overall appearance of the FAQ page to create a seamless experience for your customers
🎉 Done!
Sensbot FAQ Generator is now live and ready to help your store visitors find answers quickly. For support contact us at support@sensbot.ai.