> ## Documentation Index
> Fetch the complete documentation index at: https://docs.sensbot.ai/llms.txt
> Use this file to discover all available pages before exploring further.
# Shopify Chatbot Installation
> Sensbot Shopify Chatbot – Installation & Setup Guide
Bring intelligent AI chat to your Shopify store with the Sensbot chatbot. Follow these simple steps to install and activate it.
***
## ✅ Step 1: Install Sensbot from the Shopify App Store
1. Go to the [Sensbot AI Chatbot app page](https://apps.shopify.com/sensbot-ai-chatbot).
2. Click **Install**, then follow the prompts to install it in your Shopify store.
***
## ✅ Step 2: Open Sensbot Settings
1. In your Shopify admin, go to **Apps > Sensbot**.
2. The Sensbot settings page will open (within an iframe).
3. Sensbot will begin syncing your store’s products and orders.
> ⏳ **Note:** Syncing can take a few minutes for small stores, and up to a few hours for very large ones. You can continue setup while syncing completes in the background.
***
## ✅ Step 3: Enable App Embed
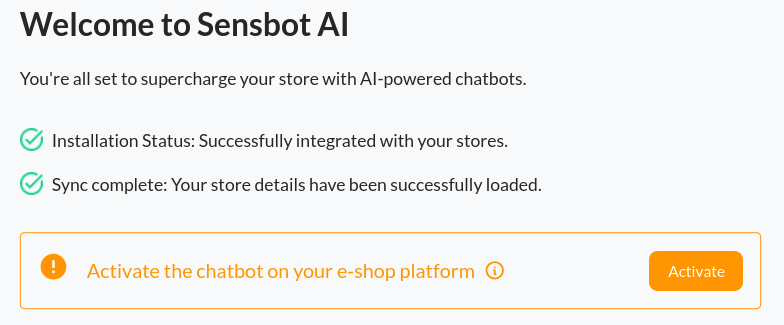
1. In the Sensbot settings, click the **"Enable App Embed"** button.\
This will redirect you to the correct section in your Shopify Theme Editor.
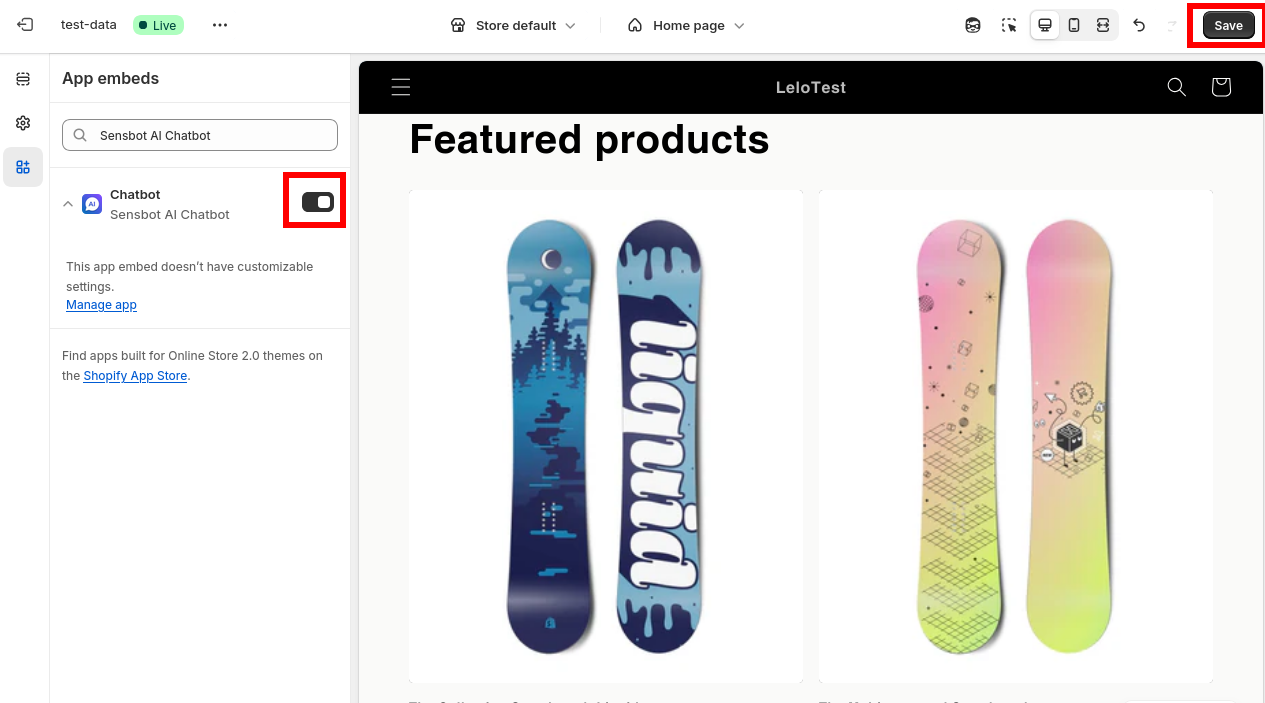
 2. In the Theme Editor:
* Find **Sensbot AI** under **App Embeds**.
* Toggle the switch to **Enable Sensbot AI App Embed**.
* Click the **Save** button in the top-right corner.
> ⚠️ **Important:** You must click **Save** for the embed to activate on your storefront.
2. In the Theme Editor:
* Find **Sensbot AI** under **App Embeds**.
* Toggle the switch to **Enable Sensbot AI App Embed**.
* Click the **Save** button in the top-right corner.
> ⚠️ **Important:** You must click **Save** for the embed to activate on your storefront.
 ***
## ✅ Step 4: Finalize Chatbot Configuration
1. Return to the **Sensbot** app (Apps > Sensbot).
2. Customize your AI chatbot’s:
* **Knowledge base**: Add content by importing web pages, uploading PDF, Word, or text documents.
* **Style & appearance**: Match the chatbot design with your store’s branding.
* **Behavior & tone**: Adjust how the chatbot speaks and interacts with customers.
3. Click **Save Settings** when you're done.
> 💡 You can update these settings anytime to better fit your brand and improve customer experience.
***
## 🎉 Done!
Sensbot is now live and ready to assist your store visitors.
For support contact us at [support@sensbot.ai](mailto:support@sensbot.ai).
***
## ✅ Step 4: Finalize Chatbot Configuration
1. Return to the **Sensbot** app (Apps > Sensbot).
2. Customize your AI chatbot’s:
* **Knowledge base**: Add content by importing web pages, uploading PDF, Word, or text documents.
* **Style & appearance**: Match the chatbot design with your store’s branding.
* **Behavior & tone**: Adjust how the chatbot speaks and interacts with customers.
3. Click **Save Settings** when you're done.
> 💡 You can update these settings anytime to better fit your brand and improve customer experience.
***
## 🎉 Done!
Sensbot is now live and ready to assist your store visitors.
For support contact us at [support@sensbot.ai](mailto:support@sensbot.ai).