> ## Documentation Index
> Fetch the complete documentation index at: https://docs.sensbot.ai/llms.txt
> Use this file to discover all available pages before exploring further.
# Outlook on the web – Usage
> How to use the Sensbot AI side panel in Outlook on the web to generate and refine email replies
# Outlook on the web – Usage
Once the add-in is [installed](/customization/email-assistant/outlook-addin/web-installation), the Sensbot AI panel works the same way in Outlook on the web as it does in the [classic desktop add-in](/customization/email-assistant/outlook-addin/usage). Select an email and the panel shows the same AI analysis, response tabs, and refinement tools.
This also applies to the **new Outlook for Windows** — the new desktop app uses the same web add-in, so the steps below are identical whether you open Outlook in a browser or in the new Outlook for Windows app.
***
## Opening the add-in
1. Open or select an email.
2. On the ribbon, select the **Sensbot** button (in the **Add-ins** group). The **Sensbot AI** pane opens on the right side of the window.
 If you don't see the button, look under the **...** more actions menu on the message.
### Keep the pane in sync as you move between emails
Select the **pin icon (📌)** at the top of the Sensbot pane. When pinned, the pane stays open and updates automatically as you move between emails, so you don't have to reopen it for each message.
Pinning is available on **Microsoft 365 work accounts**. It isn't offered on personal **Outlook.com** accounts — that's a Microsoft platform limitation, not a Sensbot setting. On a personal account the panel still works; you just reopen it per email.
***
## Login to Sensbot
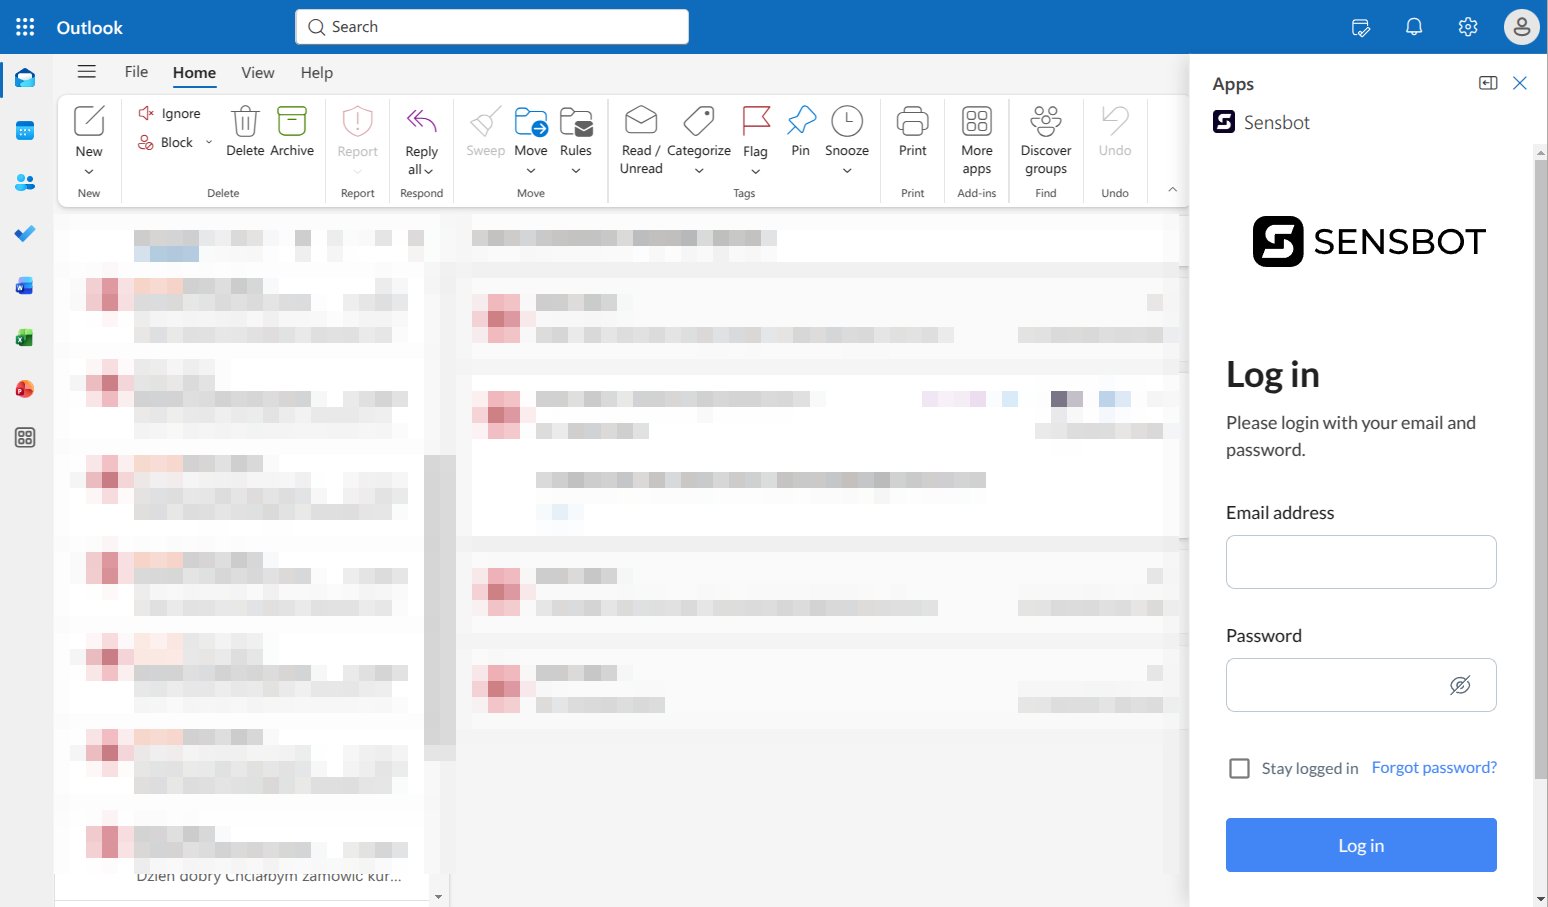
When you select the **Sensbot** icon in the ribbon, the Sensbot side pane opens with a login screen. Log in with the **email and password you set when activating standalone access** — the same login you use for the [Sensbot platform](https://platform.sensbot.ai) and the desktop add-in. Tick **Stay logged in** so you don't have to sign in each time.
If you don't see the button, look under the **...** more actions menu on the message.
### Keep the pane in sync as you move between emails
Select the **pin icon (📌)** at the top of the Sensbot pane. When pinned, the pane stays open and updates automatically as you move between emails, so you don't have to reopen it for each message.
Pinning is available on **Microsoft 365 work accounts**. It isn't offered on personal **Outlook.com** accounts — that's a Microsoft platform limitation, not a Sensbot setting. On a personal account the panel still works; you just reopen it per email.
***
## Login to Sensbot
When you select the **Sensbot** icon in the ribbon, the Sensbot side pane opens with a login screen. Log in with the **email and password you set when activating standalone access** — the same login you use for the [Sensbot platform](https://platform.sensbot.ai) and the desktop add-in. Tick **Stay logged in** so you don't have to sign in each time.
 ### Don't have standalone access yet?
If you've been using Sensbot only through your e-commerce platform (Shopify, IdoSell, Shoper, etc.) and don't have a direct login password yet, you need to enable standalone access first:
1. Open the Sensbot app inside your e-commerce platform.
2. Go to **Account → Profile**.
3. Click the orange button **"Enable direct access"**.
### Don't have standalone access yet?
If you've been using Sensbot only through your e-commerce platform (Shopify, IdoSell, Shoper, etc.) and don't have a direct login password yet, you need to enable standalone access first:
1. Open the Sensbot app inside your e-commerce platform.
2. Go to **Account → Profile**.
3. Click the orange button **"Enable direct access"**.
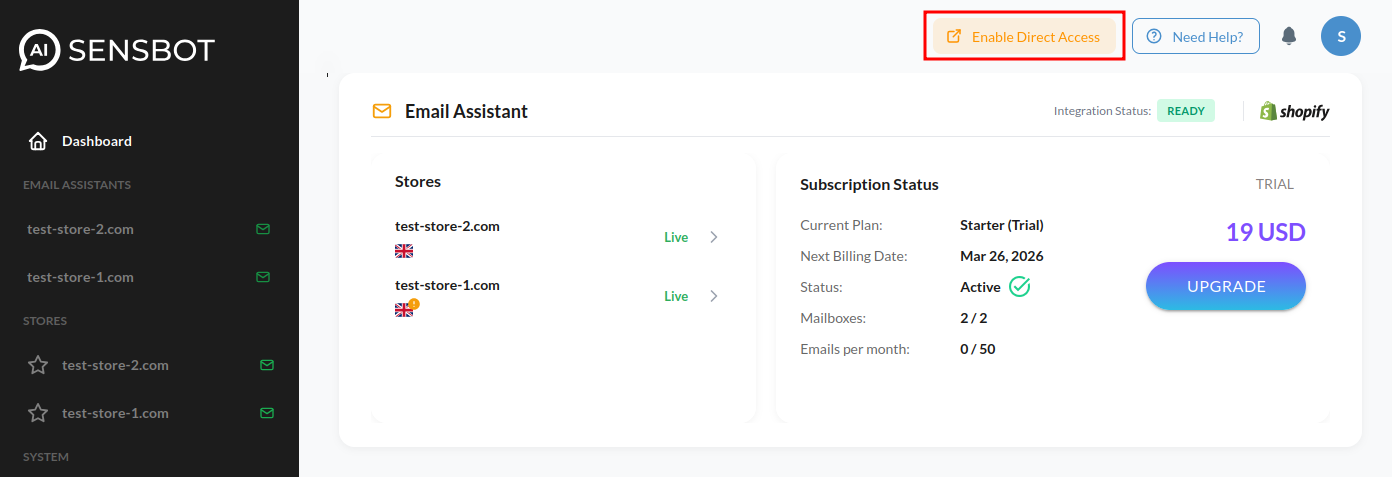 This lets you create a password and log in directly at [https://platform.sensbot.ai/](https://platform.sensbot.ai/) or inside the Sensbot Outlook add-in.
***
## Generating a response
Once you're logged in, the side pane follows whichever email you have selected. When you select a message, the pane shows the reply Sensbot already generated for it, or lets you generate a new one — along with the supporting context (analysis, order, and product details) for that email.
When no email is selected, the panel shows a placeholder asking you to select an email. Select a message and the panel loads it automatically.
If the email has not been processed yet, the panel shows an optional **instructions field** and a **Generate** button.
**Optional instructions** — Type a short hint before generating to guide the response, for example:
* *Keep it short*
* *Translate to English*
* *Be more formal*
Leave the field blank to let Sensbot decide on its own.
Click **Generate** (or press Enter inside the instructions field). Sensbot reads the email, looks up relevant orders, products, or knowledge base entries from your store, and writes a draft reply in your brand voice.
***
## Response ready – two-tab view
Once processing is complete, the panel shows two tabs: **Response** and **Analysis**.
### Response tab
The **Response** tab shows the AI-generated draft reply.
| Element | What it does |
| ------------------------ | ---------------------------------------------------------------------------------- |
| **Use this response** | Inserts the draft directly into Outlook's reply composer |
| **Copy** | Copies the plain-text version of the draft to the clipboard |
| Version arrows (1 / 2 …) | Navigate between multiple versions if you have refined the response more than once |
#### Refining the response
Below the draft is a **refine box**. Type an instruction and choose one of:
* **Refine response** — Keeps the same reasoning but adjusts tone, length, or language. The new version is added alongside the previous one, and you can navigate between them using the version arrows.
* **New response** — Generates a completely fresh draft, ignoring the previous one.
### Analysis tab
The **Analysis** tab gives you insight into what Sensbot understood about the email.
**Summary badges** — Coloured pills summarise the email at a glance:
| Badge | Examples |
| ------------- | ---------------------------------------------------------- |
| **Intent** | Order inquiry, Return request, Complaint, General question |
| **Urgency** | High (red), Medium (yellow), Low (green) |
| **Sentiment** | Positive (green), Neutral (grey), Negative (red) |
| **Category** | Label matching your configured email categories |
**Order / Product card** — When the email references an order or product, a card appears with key details (order number, status, items, total, dates). Click the card to expand or collapse the full details.
**Decision card** — For emails that require a policy-based decision (e.g. a refund or return), a Decision card shows the recommended action, its risk level (Low / Medium / High), the reasoning behind it, and the store rules that guided the decision.
**Actions taken** — If Sensbot performed automated actions (e.g. tagged the email, created a task, updated an order), these appear as pills at the bottom of the tab.
***
## No response required
If the AI determines the email does not need a reply (e.g. a newsletter or auto-confirmation), the panel shows a **No Response Required** message. You can still use the refine box to override this and request a draft manually.
***
## Using the draft in Outlook
Click **Use this response** in the Response tab. Sensbot inserts the formatted draft directly into Outlook's reply window — ready to review, edit, and send. Alternatively, click **Copy** to copy the plain text and paste it anywhere you need.
***
## Which mailbox am I answering for?
At the bottom of the panel you'll see which mailbox the current assistant answers for (e.g. `info@yourstore.com`). If you manage several stores, this **mailbox indicator** is how you confirm the right store's assistant is responding — its language, signature, and store data.
***
## "No assistant for this mailbox"
If you open an email in a mailbox that has **no Sensbot assistant configured** — for example your personal work inbox, when Sensbot is set up for the store's shared mailbox — the panel says so and lists the mailboxes that **do** have assistants.
Nothing is wrong — just open the email from the store mailbox instead. If a **store** mailbox shows this message, its email account may not be connected yet — check your [Email Assistant settings](/customization/email-assistant/outlook-addin/microsoft-365-setup#connecting-your-support-mailbox).
***
## Multiple stores
If your company runs several stores under one Sensbot account, you don't have to choose anything in Outlook: Sensbot recognizes which store mailbox an email belongs to and answers with that store's assistant automatically. The mailbox indicator confirms it. See [Multiple stores, one login](/customization/email-assistant/outlook-addin/microsoft-365-setup#multiple-stores-one-login).
This lets you create a password and log in directly at [https://platform.sensbot.ai/](https://platform.sensbot.ai/) or inside the Sensbot Outlook add-in.
***
## Generating a response
Once you're logged in, the side pane follows whichever email you have selected. When you select a message, the pane shows the reply Sensbot already generated for it, or lets you generate a new one — along with the supporting context (analysis, order, and product details) for that email.
When no email is selected, the panel shows a placeholder asking you to select an email. Select a message and the panel loads it automatically.
If the email has not been processed yet, the panel shows an optional **instructions field** and a **Generate** button.
**Optional instructions** — Type a short hint before generating to guide the response, for example:
* *Keep it short*
* *Translate to English*
* *Be more formal*
Leave the field blank to let Sensbot decide on its own.
Click **Generate** (or press Enter inside the instructions field). Sensbot reads the email, looks up relevant orders, products, or knowledge base entries from your store, and writes a draft reply in your brand voice.
***
## Response ready – two-tab view
Once processing is complete, the panel shows two tabs: **Response** and **Analysis**.
### Response tab
The **Response** tab shows the AI-generated draft reply.
| Element | What it does |
| ------------------------ | ---------------------------------------------------------------------------------- |
| **Use this response** | Inserts the draft directly into Outlook's reply composer |
| **Copy** | Copies the plain-text version of the draft to the clipboard |
| Version arrows (1 / 2 …) | Navigate between multiple versions if you have refined the response more than once |
#### Refining the response
Below the draft is a **refine box**. Type an instruction and choose one of:
* **Refine response** — Keeps the same reasoning but adjusts tone, length, or language. The new version is added alongside the previous one, and you can navigate between them using the version arrows.
* **New response** — Generates a completely fresh draft, ignoring the previous one.
### Analysis tab
The **Analysis** tab gives you insight into what Sensbot understood about the email.
**Summary badges** — Coloured pills summarise the email at a glance:
| Badge | Examples |
| ------------- | ---------------------------------------------------------- |
| **Intent** | Order inquiry, Return request, Complaint, General question |
| **Urgency** | High (red), Medium (yellow), Low (green) |
| **Sentiment** | Positive (green), Neutral (grey), Negative (red) |
| **Category** | Label matching your configured email categories |
**Order / Product card** — When the email references an order or product, a card appears with key details (order number, status, items, total, dates). Click the card to expand or collapse the full details.
**Decision card** — For emails that require a policy-based decision (e.g. a refund or return), a Decision card shows the recommended action, its risk level (Low / Medium / High), the reasoning behind it, and the store rules that guided the decision.
**Actions taken** — If Sensbot performed automated actions (e.g. tagged the email, created a task, updated an order), these appear as pills at the bottom of the tab.
***
## No response required
If the AI determines the email does not need a reply (e.g. a newsletter or auto-confirmation), the panel shows a **No Response Required** message. You can still use the refine box to override this and request a draft manually.
***
## Using the draft in Outlook
Click **Use this response** in the Response tab. Sensbot inserts the formatted draft directly into Outlook's reply window — ready to review, edit, and send. Alternatively, click **Copy** to copy the plain text and paste it anywhere you need.
***
## Which mailbox am I answering for?
At the bottom of the panel you'll see which mailbox the current assistant answers for (e.g. `info@yourstore.com`). If you manage several stores, this **mailbox indicator** is how you confirm the right store's assistant is responding — its language, signature, and store data.
***
## "No assistant for this mailbox"
If you open an email in a mailbox that has **no Sensbot assistant configured** — for example your personal work inbox, when Sensbot is set up for the store's shared mailbox — the panel says so and lists the mailboxes that **do** have assistants.
Nothing is wrong — just open the email from the store mailbox instead. If a **store** mailbox shows this message, its email account may not be connected yet — check your [Email Assistant settings](/customization/email-assistant/outlook-addin/microsoft-365-setup#connecting-your-support-mailbox).
***
## Multiple stores
If your company runs several stores under one Sensbot account, you don't have to choose anything in Outlook: Sensbot recognizes which store mailbox an email belongs to and answers with that store's assistant automatically. The mailbox indicator confirms it. See [Multiple stores, one login](/customization/email-assistant/outlook-addin/microsoft-365-setup#multiple-stores-one-login).