> ## Documentation Index
> Fetch the complete documentation index at: https://docs.sensbot.ai/llms.txt
> Use this file to discover all available pages before exploring further.
# Look & Appearance Settings
> Customize the web chat widget design and layout
These settings define how the chatbot appears on your site and how visitors interact with it visually. From colors and logos to positioning and animations, you have full control over the chat widget's appearance.
## Accessing Appearance Settings
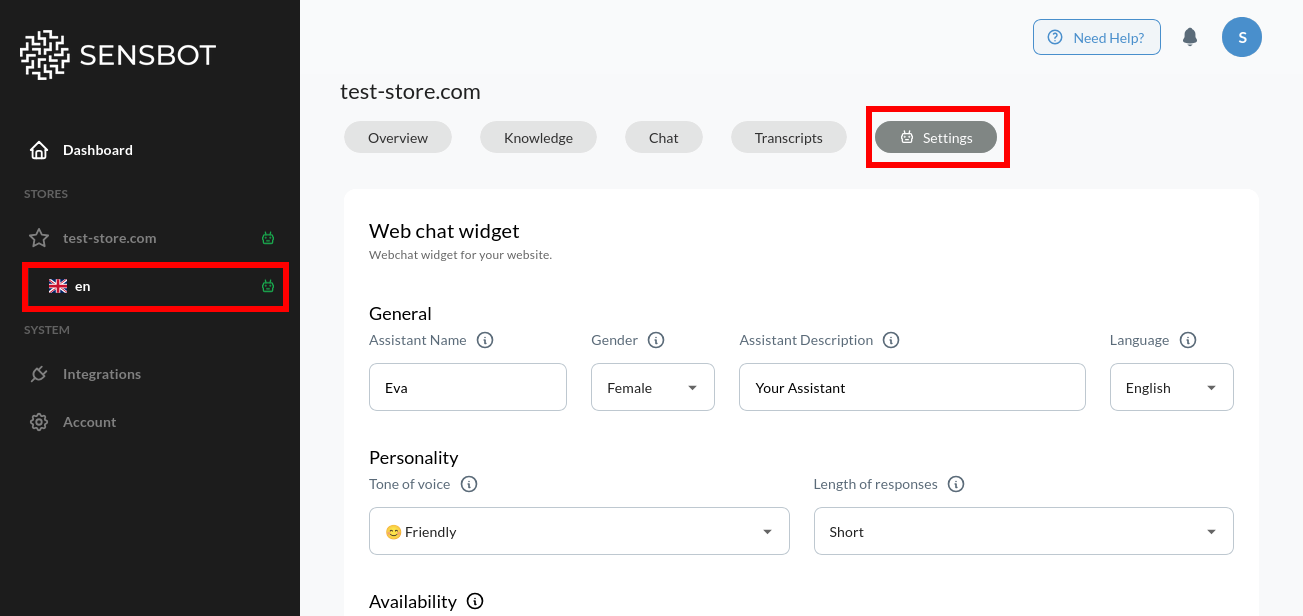
1. Open the **Sensbot AI app** in your platform admin panel (Shopify, IdoSell, Upgates, Shoper, etc.)
2. In the **main menu**, choose the **store** you want to customize
3. Select the **locale/language** for which you want to modify the chatbot
4. Open the **Settings** tab to start adjusting chatbot options
You'll see the **Web chat widget** section which controls the visual style and layout of the chat window on your website.
## Basic Identity Settings
 ### Assistant Name
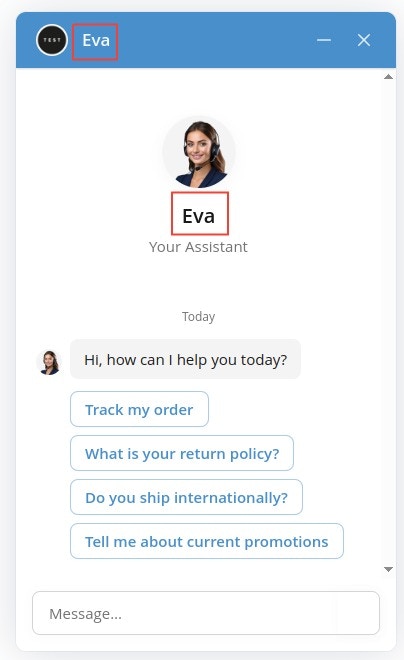
The assistant's displayed name (e.g., *Luna*, *Shop Helper*, *Alex from PMBike*). This name appears under the avatar in the chat header, helping humanize the chatbot experience and make interactions feel more personal.
### Assistant Name
The assistant's displayed name (e.g., *Luna*, *Shop Helper*, *Alex from PMBike*). This name appears under the avatar in the chat header, helping humanize the chatbot experience and make interactions feel more personal.
 **Examples:**
* For a bike shop: "Alex from PMBike"
* For fashion retail: "Emma"
* For tech support: "Tech Helper"
### Assistant Description
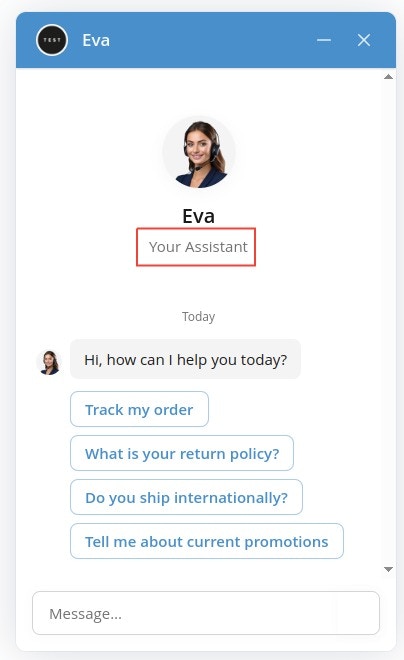
Displayed below the assistant's name inside the chat window header. Use it to describe your assistant's role and set expectations.
**Examples:**
* For a bike shop: "Alex from PMBike"
* For fashion retail: "Emma"
* For tech support: "Tech Helper"
### Assistant Description
Displayed below the assistant's name inside the chat window header. Use it to describe your assistant's role and set expectations.
 **Examples:**
* "Your personal shopping assistant"
* "Here to help with orders and returns"
* "Product expert & support specialist"
### Gender
Choose a gender (Male, Female, Other) to personalize the assistant's voice and persona. This helps create a consistent character for your chatbot.
### Language
Select the main language for this chatbot instance. The chatbot will automatically respond in this language. You can configure different languages for different locales of your store.
## Welcome Experience
**Examples:**
* "Your personal shopping assistant"
* "Here to help with orders and returns"
* "Product expert & support specialist"
### Gender
Choose a gender (Male, Female, Other) to personalize the assistant's voice and persona. This helps create a consistent character for your chatbot.
### Language
Select the main language for this chatbot instance. The chatbot will automatically respond in this language. You can configure different languages for different locales of your store.
## Welcome Experience
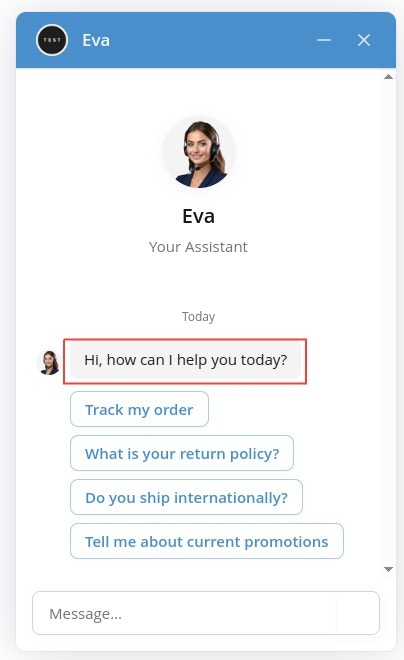
 ### Welcome Message
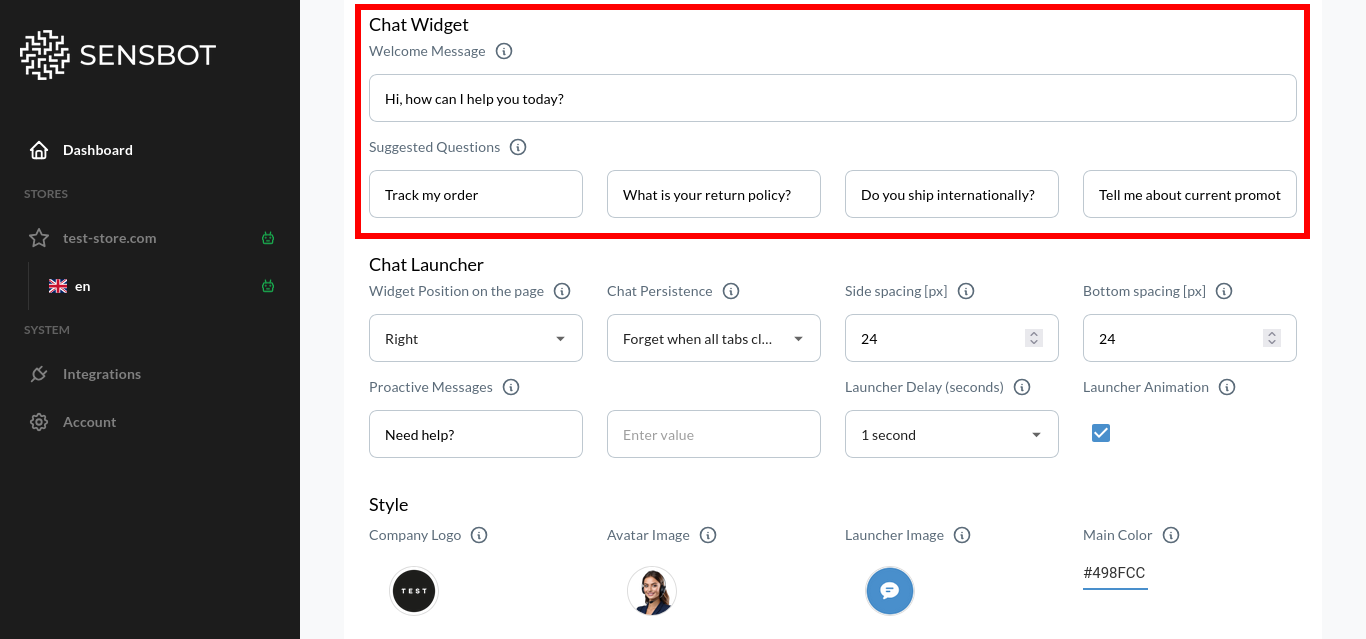
The first message customers see when they open the chat window. Make it friendly, clear, and action-oriented.
### Welcome Message
The first message customers see when they open the chat window. Make it friendly, clear, and action-oriented.
 **Examples:**
* "Hi there! How can I help you today?"
* "Welcome! Looking for something specific?"
* "Hello! I'm here to answer your questions about our products."
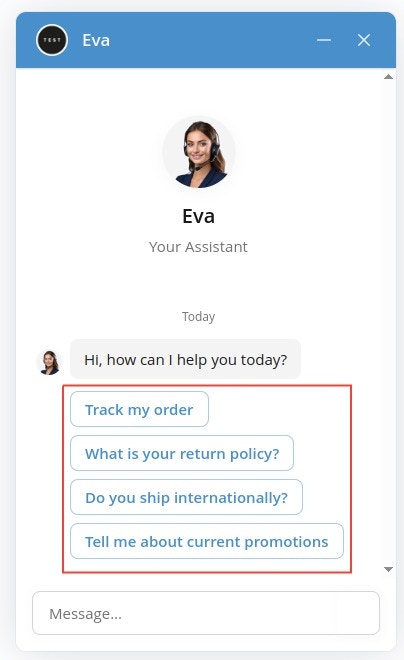
### Suggested Questions
Quick-reply buttons shown below the welcome message to guide users toward common topics. These help customers get started quickly without typing.
**Examples:**
* "Hi there! How can I help you today?"
* "Welcome! Looking for something specific?"
* "Hello! I'm here to answer your questions about our products."
### Suggested Questions
Quick-reply buttons shown below the welcome message to guide users toward common topics. These help customers get started quickly without typing.
 **Examples:**
* "Track my order"
* "What is your return policy?"
* "Do you ship internationally?"
* "Help me find the right size"
* "Tell me about current promotions"
**Best Practices:**
* Use 3-5 suggested questions
* Focus on your most common customer inquiries
* Keep questions short and clear
* Update seasonally (e.g., add "Holiday shipping" in December)
## Next Steps
Now that you understand the basic appearance settings, explore these specific customization areas:
### Visual Customization
* **[Colors & Branding](/customization/appearance/colors)** - Customize color schemes, logos, avatars, and brand elements
* **[Widget Layout & Position](/customization/appearance/layout)** - Adjust positioning, spacing, and display options
### Behavioral Customization
* **[Chat Availability & Persistence](/customization/appearance/availability)** - Control when chatbot appears and how it remembers conversations
* **[Proactive Engagement](/customization/appearance/engagement)** - Configure proactive messages, launcher delays, and animations
### Additional Configuration
* **[Behavior & Tone](/customization/behavior)** - Define how your chatbot communicates
* **[Knowledge Base](/customization/knowledge-base)** - Add content for accurate, brand-specific answers
**Examples:**
* "Track my order"
* "What is your return policy?"
* "Do you ship internationally?"
* "Help me find the right size"
* "Tell me about current promotions"
**Best Practices:**
* Use 3-5 suggested questions
* Focus on your most common customer inquiries
* Keep questions short and clear
* Update seasonally (e.g., add "Holiday shipping" in December)
## Next Steps
Now that you understand the basic appearance settings, explore these specific customization areas:
### Visual Customization
* **[Colors & Branding](/customization/appearance/colors)** - Customize color schemes, logos, avatars, and brand elements
* **[Widget Layout & Position](/customization/appearance/layout)** - Adjust positioning, spacing, and display options
### Behavioral Customization
* **[Chat Availability & Persistence](/customization/appearance/availability)** - Control when chatbot appears and how it remembers conversations
* **[Proactive Engagement](/customization/appearance/engagement)** - Configure proactive messages, launcher delays, and animations
### Additional Configuration
* **[Behavior & Tone](/customization/behavior)** - Define how your chatbot communicates
* **[Knowledge Base](/customization/knowledge-base)** - Add content for accurate, brand-specific answers